If you haven’t installed and pre-configured Tonder’s JS SDK, refer to the Installation guide here.
Configuration
Before initializing an instance of Tonder SDK, ensure that you have configured it properly. Follow the usage example below:Add the required ID to your HTML
Tonder’s JS SDK needs an entry point to operate. This entry point is defined by adding a
tonder-checkout ID to an empty div, like the example below:Initialize Tonder's SDK Instance
Initialize Tonder’s JS SDK instance with the following parameters:
| Field | Description |
|---|---|
mode | Environment mode. Options: stage, production, sandbox. Default: stage |
apiKey | The API key used for authentication and authorization. |
returnUrl | The URL to which the user is redirected after the checkout process, regardless of success or failure. |
customization | This object is designed to customize the behavior of the checkout. It is used to adjust both the interface options and operational parameters. Refer to the Customizations section for more details. |
styles | Custom styles object that allows you to customize the appearance of the inline checkout. It may include properties such as colors, fonts, and other styling options. Refer to the Styling section for more details. |
Configure checkout method (Optional)
You can use the
configureCheckout method to set initial customer information, such as their email address, allowing to retrieve the respectives user’s saved cards.Inject checkout method
Call the This method will use the element with id 
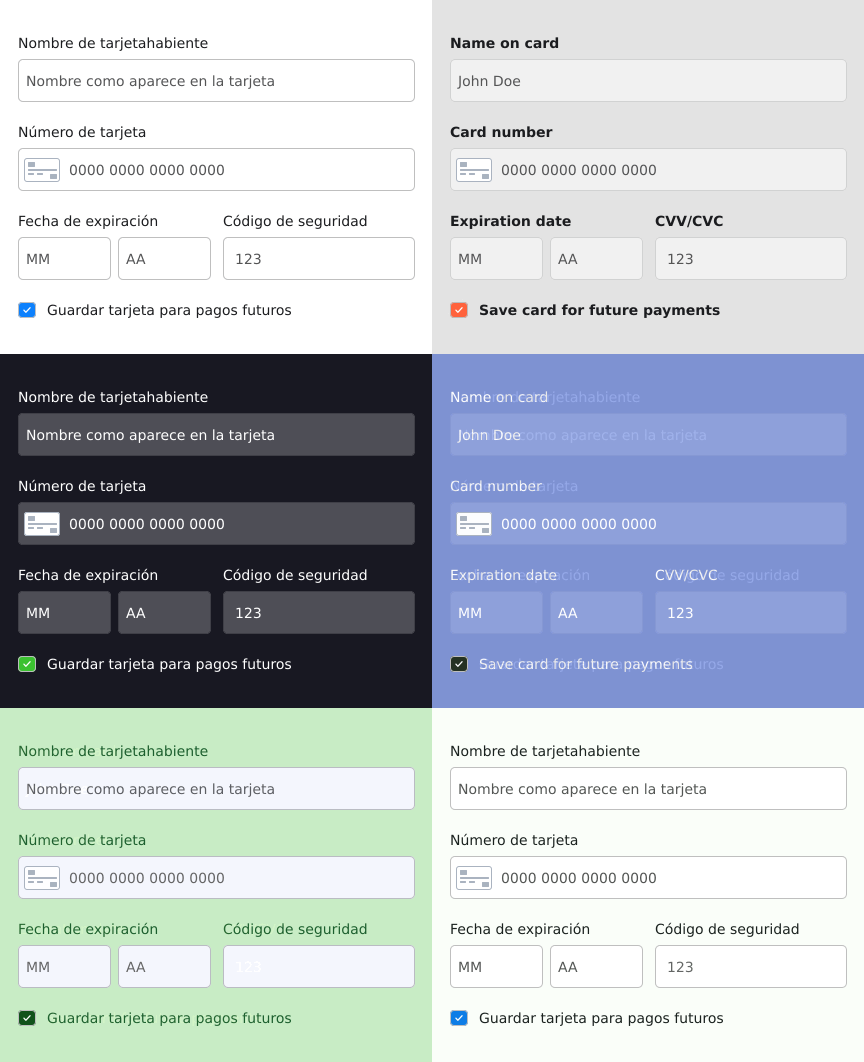
injectCheckout method with your inlineCheckout instance, with the code below:tonder-checkout added in Step 1 to render the checkout elements, as exemplified by the image below:
Add 3DS verification
Use Tonder’s SDK
verify3dsTransaction() method to validate if the 3DS challenge was successful or not. Use the example below to call the method and handle the response as needed:Add a pay button
Lastly, you need to create a button to submit the form. This button needs to have an event listener that calls the
payment method from the inlineCheckout instance, sending the checkout data as payload, like presented below:Checkout data
The payment function payload needs to be an object with detailed information about the customer, currency and cart. Below you find details abou each needed field:Customer
Customer
| Field | Description |
|---|---|
firstName | The first name of the customer. |
lastName | The last name of the customer. |
country | The country of residence for the customer. |
address | The street address in the specified city for the customer. |
city | The city of residence for the customer. |
state | The state or region within the country for the customer. |
postCode | The postal code or ZIP code of the address for the customer. |
email | The email address for communication with the customer. |
phone | The contact phone number for the customer. |
Currency
Currency
| Field | Description |
|---|---|
currency | The currency used by the customer in ISO 4217 format. |
Cart
Cart
| Field | Description |
|---|---|
total | The total amount for the customer’s purchase. |
items | An array containing details of individual items in the purchase. |
items[n].description | The description of the first item. |
items[n].quantity | The quantity of the first item in the purchase. |
items[n].price_unit | The unit price of the first item. |
items[n].discount | The discount applied to the first item. |
items[n].taxes | The taxes applied to the first item. |
items[n].product_reference | The reference number of the product for the first item. |
items[n].name | The name of the first item (e.g., “T-Shirt”). |
items[n].amount_total | The total amount for the first item. |
Checkout data example
Below you find an example of a checkout data object:checkoutData example
checkoutData example

