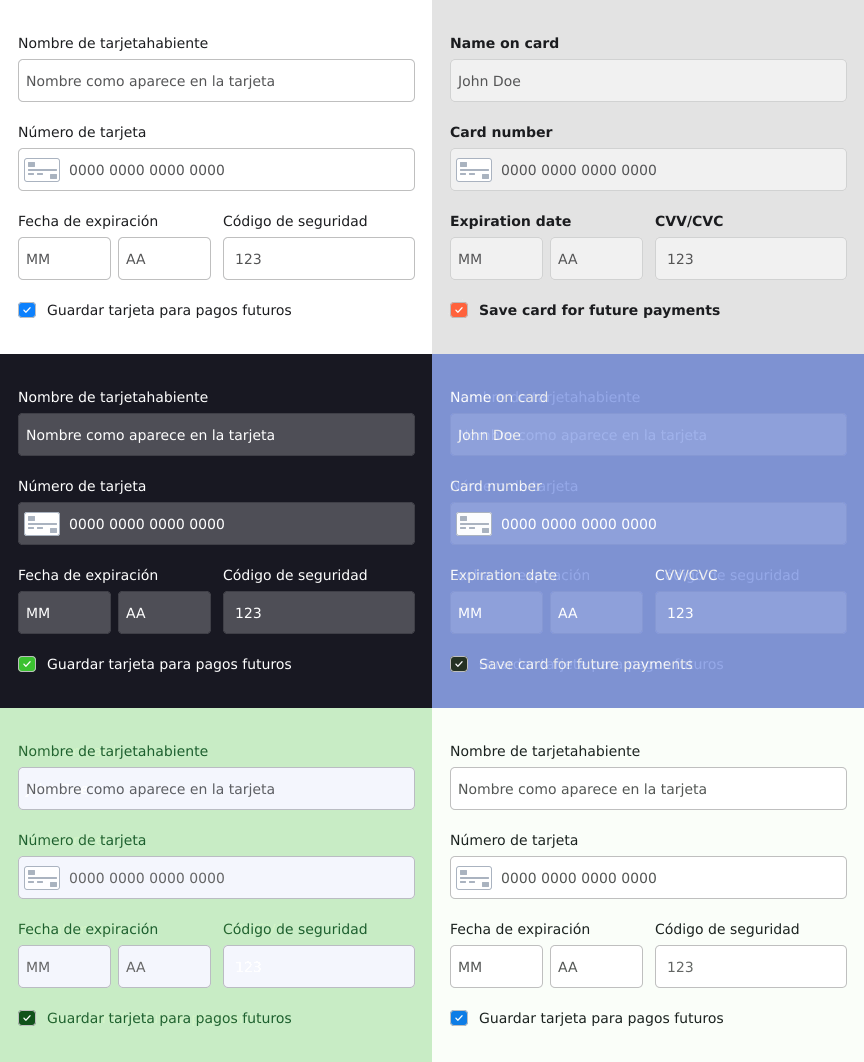
If you haven’t installed and pre-configured Tonder’s JS SDK, refer to the Installation guide here.
Configuration
Before initializing an instance of Tonder SDK, ensure that you have configured it properly. Follow the usage example below:1
Add the required ID to your HTML
Tonder’s JS SDK needs an entry point to operate. This entry point is defined by adding a
tonder-checkout ID to an empty div, like the example below:2
Initialize Tonder's SDK Instance
Initialize Tonder’s JS SDK instance with the following parameters:
| Field | Description |
|---|---|
mode | Environment mode. Options: stage, production, sandbox. Default: stage |
apiKey | The API key used for authentication and authorization. |
returnUrl | The URL to which the user is redirected after the checkout process, regardless of success or failure. |
customization | This object is designed to customize the behavior of the checkout. It is used to adjust both the interface options and operational parameters. Refer to the Customizations section for more details. |
styles | Custom styles object that allows you to customize the appearance of the inline checkout. It may include properties such as colors, fonts, and other styling options. Refer to the Styling section for more details. |
3
Configure checkout method (Optional)
You can use the
configureCheckout method to set initial customer information, such as their email address, allowing to retrieve the respectives user’s saved cards.4
Inject checkout method
Call the 
injectCheckout method with your inlineCheckout instance, with the code below:
5
Add a pay button
Lastly, you need to create a button to submit the form. This button needs to have an event listener that calls the
payment method from the liteCheckout instance, sending the checkout data as payload, like presented below:Class Methods
With your Lite Checkout instance configured, you’ll have at your disposal the following methods:Cards
Tonder’s SDK offers the following methods to manage customer cards:getCustomerCardssaveCustomerCardremoveCustomerCard
Get Customer Cards
Use thegetCustomerCards method to retrieve previously saved customer cards:
Save Customer Card
Use thesaveCustomerCard method to save a new card into the system. This method requires an object as parameter to define the card’s properties:
Sure! Here’s a markdown table with the keys and their descriptions:
| Key | Description |
|---|---|
card_number | The credit card number without spaces or dashes. |
cvv | The card verification value, a 3 or 4-digit code. |
expiration_month | The month when the card expires. |
expiration_year | The year when the card expires. |
cardholder_name | The full name of the cardholder as on the card. |
Remove Customer Card
Use theremoveCustomerCards method to delete a previously saved customer card by passing the card ID as parameter:
Get Customer Payment Methods
Use this method to retrieve the customer previously registered payment methods:Payment
To create a new payment with the Lite SDK, use thepayment method. This method requires an object as parameter with the following data:
| Key | Description |
|---|---|
| customer | An object containing customer information |
| cart | An object containing cart and item details |
| currency | The currency code for the transaction (e.g., “MXN”) |
| metadata | An object for additional metadata (e.g., order ID) |
| card | An object containing card details for a new card |
| payment_method | The selected payment method (optional) |
customer
customer
| Key | Description |
|---|---|
| firstName | Customer’s first name |
| lastName | Customer’s last name |
| country | Customer’s country |
| address | Customer’s street address |
| city | Customer’s city |
| state | Customer’s state or region |
| postCode | Customer’s postal code |
| Customer’s email address | |
| phone | Customer’s phone number |
cart
cart
| Key | Description |
|---|---|
| total | Total amount for the cart |
| items | An array of item objects |
| Key | Description |
|---|---|
| description | Description of the product |
| quantity | Quantity of the product |
| price_unit | Unit price of the product |
| discount | Discount applied to the product |
| taxes | Taxes applied to the product |
| product_reference | Reference code for the product |
| name | Name of the product |
| amount_total | Total amount for this product (after discount and taxes) |
card
card
| Key | Description |
|---|---|
| card_number | The credit card number without spaces or dashes |
| cvv | Card Verification Value (3 or 4-digit code) |
| expiration_month | Card’s expiration month (e.g., “12”) |
| expiration_year | Card’s expiration year (e.g., “25”) |
| cardholder_name | Name on the credit card |
card object with the saved card’s identifier:payment_method
payment_method
Specify this key if using a different payment method instead of a card.
| Key | Description |
|---|---|
| payment_method | The selected payment method (e.g., “Spei”) |
metadata
metadata
| Key | Description |
|---|---|
| order_id | Unique identifier for the order |
3DS Verification
You can use theverify3dsTransaction() method to validate if a 3DS challenge was successful or not. Use the example below to call the method and handle the response as needed:
Field Validation
Tonder’s SDK provides validation functions to ensure the integrity of card data before submitting them:| Function | Description |
|---|---|
validateCardNumber(cardNumber) | Validates the card number using the Luhn algorithm. |
validateCardholderName(name) | Checks if the cardholder name is valid. |
validateCVV(cvv) | Ensures the CVV is in the correct format. |
validateExpirationDate(expirationDate) | Validates the expiration date in MM/YY format. |
validateExpirationMonth(month) | Checks if the expiration month is valid. |
validateExpirationYear(year) | Validates the expiration year. |
Example

