> ## Documentation Index
> Fetch the complete documentation index at: https://docs.tonder.io/llms.txt
> Use this file to discover all available pages before exploring further.
# How to Use secureToken for Secure Card Saving
This guide explains how to securely save customer card details using Tonder’s `secureToken`. To obtain the token, you need to call the `/api/secure-token/` endpoint from your the backend, ensuring secure and authenticated token generation. Once the token is retrieved, it can be implemented in your project from either the frontend or backend, depending on your setup and requirements.
You can generate the secureToken in either Stage and Production environments.
```
https://stage.tonder.io/api/secure-token/
```
```
https://app.tonder.io/api/secure-token/
```
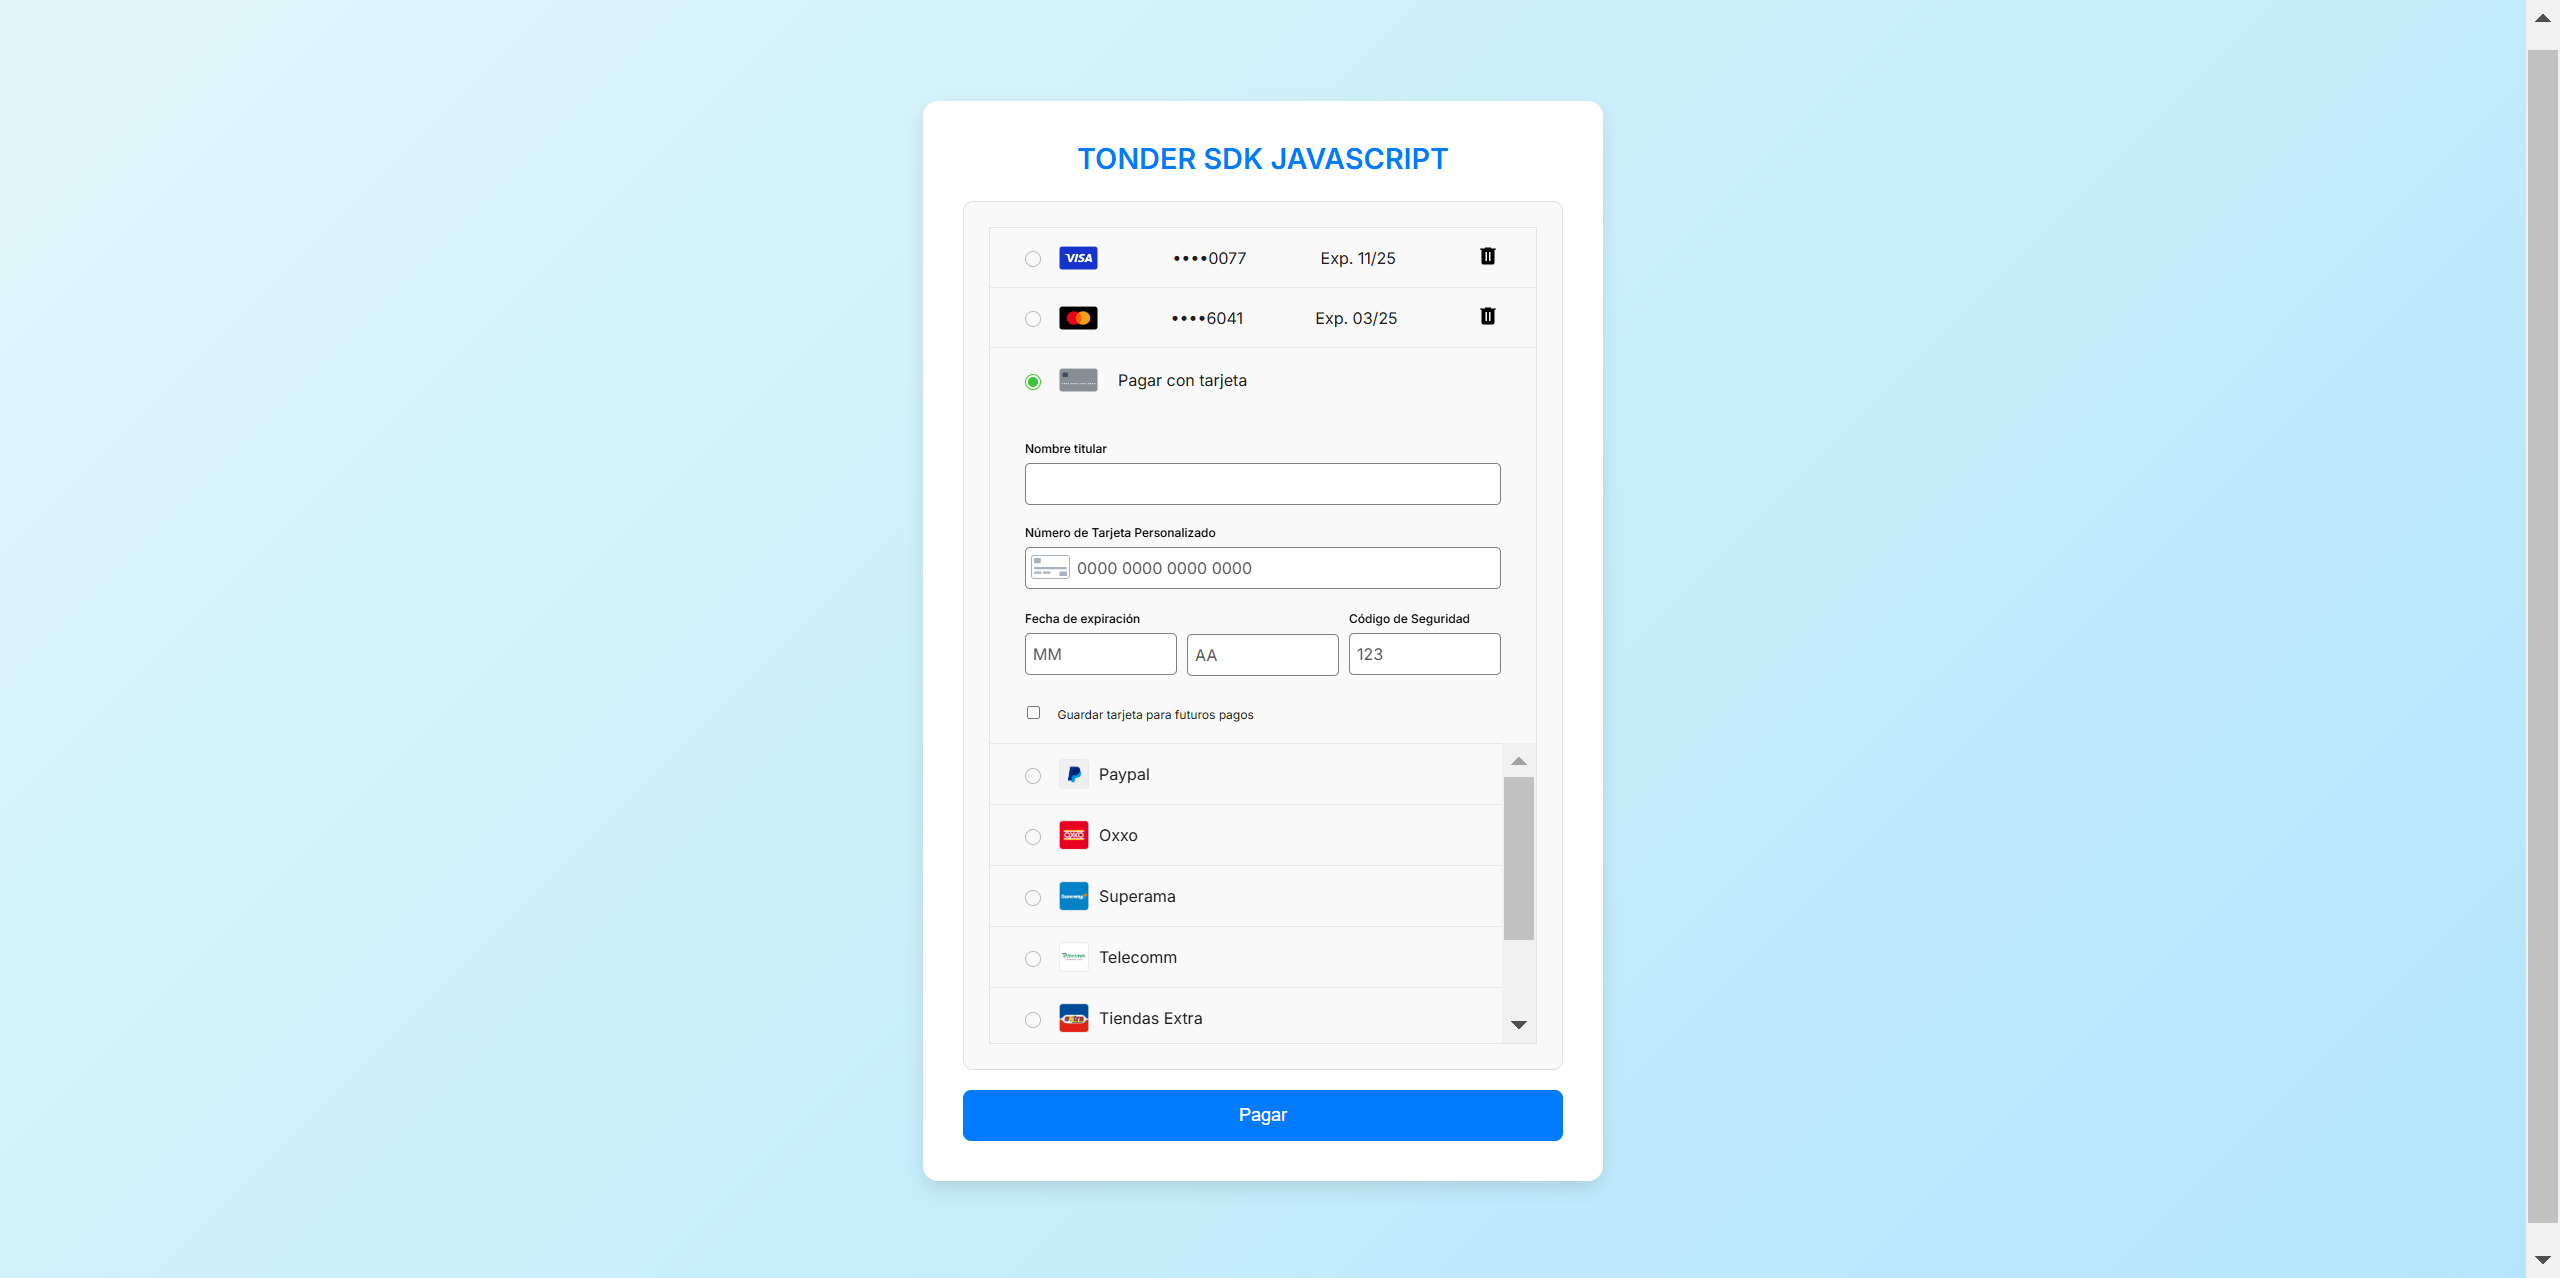
To allow your customers to save cards, you can customize card-saving options within the `customization` object. Control whether customers can save cards, auto-save options, and the visibility of saved cards when starting the SDK.
* **`showSaveCardOption`**: Allows users to choose to save their card.
* **`autoSave`**: Enables automatic card saving without user confirmation.
* **`showSaved`**: Displays previously saved cards to the customer.
The Save Card functionality is specific to each business and should be configured accordingly.
```javascript npm package option theme={null}
import { InlineCheckout } from "tonder-sdk";
const inlineCheckout = new InlineCheckout({
apiKey,
returnUrl,
styles: customStyles,
customization: {
showSaveCardOption: true,
autoSave: false,
showSaved: true,
}
});
```
```javascript Script tag option theme={null}
const inlineCheckout = new TonderSdk.InlineCheckout({
apiKey,
returnUrl,
styles: customStyles,
customization: {
showSaveCardOption: true,
autoSave: false,
showSaved: true,
}
});
```
You'll need your API Key to generate a `secureToken`. You can find your Secret API key by accessing the [**Developers**](/dashboard/dev-api-keys) section in your Tonder Dashboard.
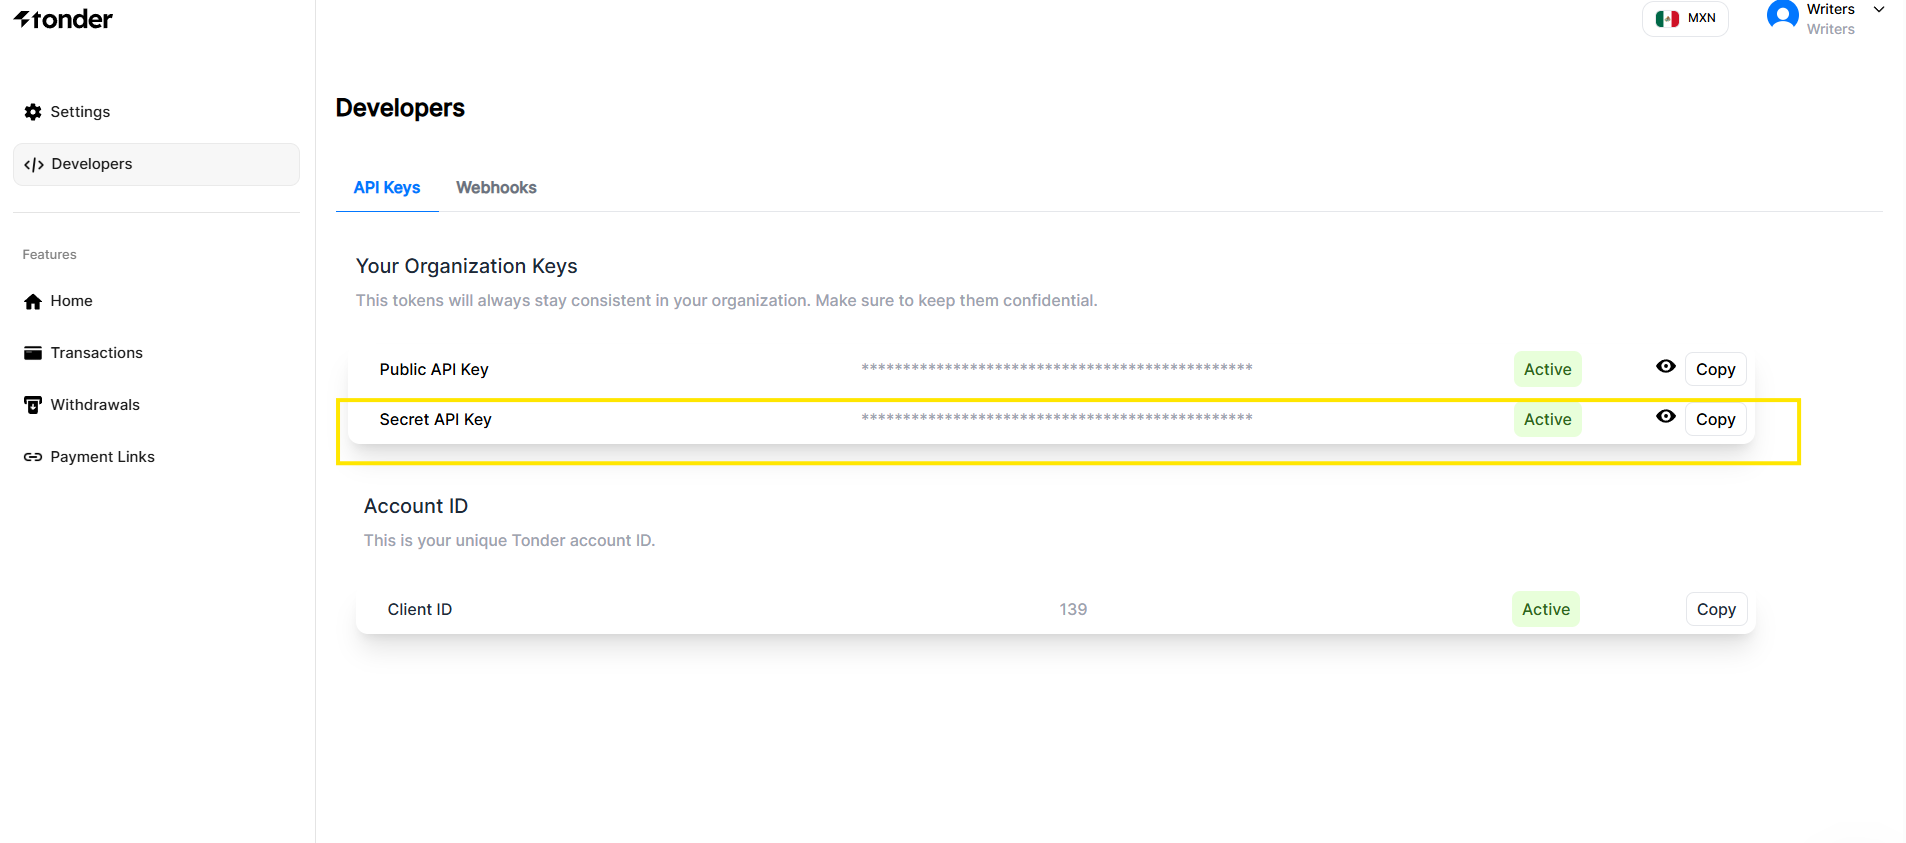 With your API Key in hand, you need to make a POST request to the [Create a Secure Token](/reference/create-secure-token) endpoint:
```javascript Stage theme={null}
fetch("https://stage.tonder.io/api/secure-token/", {
method: 'POST',
headers: {
'Authorization': `Token YOUR_SECRET_KEY`,
'Content-Type': 'application/json'
}
})
.then(response => response.json())
.then(result => {
const secureToken = result.access;
// Use secureToken in the frontend for secure card-saving
});
```
```javascript Production theme={null}
fetch("https://app.tonder.io/api/secure-token/", {
method: 'POST',
headers: {
'Authorization': `Token YOUR_SECRET_KEY`,
'Content-Type': 'application/json'
}
})
.then(response => response.json())
.then(result => {
const secureToken = result.access;
// Use secureToken in the frontend for secure card-saving
});
```
Within the JSON response, you can find an `access` property. This is the generated `secureToken` you need for the next steps. Below is an example format of the response:
```json theme={null}
{
"access": "eyJhbGciOiJIUzI1NiIsInR5cCI6IkpXVCJ9.eyJ0b2tlbl90eXBlIjoiYWNjZXNzIiwiZXhwIjoxNzI3NzI3MTM3LCJpYXQiOjE3Mjc3MjM1MzcsImp0aSI6IjFjZTBkZmExODgwNzQzNGI4MDk2MzdlNTliNmM1NWMzIiwidXNlcl9pZCI6NDYxfQ.DFGNJr7JT6z3cp976PDBT57uX7LaYJLYBsdK8kaSAOI"
}
```
The generated `secureToken` is valid for **1 hour**. Ensure that it is used within this time frame to avoid authentication errors.
After obtaining the `secureToken`, configure the Tonder SDK checkout on the frontend to authenticate and secure transactions. Use the `configureCheckout` method, which accepts the `secureToken` along with customer data:
```javascript theme={null}
// Token provided by the backend
const secureToken = "YOUR_SECURE_TOKEN";
// Configure checkout with secureToken
inlineCheckout.configureCheckout({
customer: checkoutData.customer,
secureToken: secureToken // Secure token for authenticated card-saving
});
```
Where:
* **`checkoutData.customer`**: Contains customer information.
* **`secureToken`**: The token generated by the backend.
After completing these steps, your SDK implementation should look like the following example:
With your API Key in hand, you need to make a POST request to the [Create a Secure Token](/reference/create-secure-token) endpoint:
```javascript Stage theme={null}
fetch("https://stage.tonder.io/api/secure-token/", {
method: 'POST',
headers: {
'Authorization': `Token YOUR_SECRET_KEY`,
'Content-Type': 'application/json'
}
})
.then(response => response.json())
.then(result => {
const secureToken = result.access;
// Use secureToken in the frontend for secure card-saving
});
```
```javascript Production theme={null}
fetch("https://app.tonder.io/api/secure-token/", {
method: 'POST',
headers: {
'Authorization': `Token YOUR_SECRET_KEY`,
'Content-Type': 'application/json'
}
})
.then(response => response.json())
.then(result => {
const secureToken = result.access;
// Use secureToken in the frontend for secure card-saving
});
```
Within the JSON response, you can find an `access` property. This is the generated `secureToken` you need for the next steps. Below is an example format of the response:
```json theme={null}
{
"access": "eyJhbGciOiJIUzI1NiIsInR5cCI6IkpXVCJ9.eyJ0b2tlbl90eXBlIjoiYWNjZXNzIiwiZXhwIjoxNzI3NzI3MTM3LCJpYXQiOjE3Mjc3MjM1MzcsImp0aSI6IjFjZTBkZmExODgwNzQzNGI4MDk2MzdlNTliNmM1NWMzIiwidXNlcl9pZCI6NDYxfQ.DFGNJr7JT6z3cp976PDBT57uX7LaYJLYBsdK8kaSAOI"
}
```
The generated `secureToken` is valid for **1 hour**. Ensure that it is used within this time frame to avoid authentication errors.
After obtaining the `secureToken`, configure the Tonder SDK checkout on the frontend to authenticate and secure transactions. Use the `configureCheckout` method, which accepts the `secureToken` along with customer data:
```javascript theme={null}
// Token provided by the backend
const secureToken = "YOUR_SECURE_TOKEN";
// Configure checkout with secureToken
inlineCheckout.configureCheckout({
customer: checkoutData.customer,
secureToken: secureToken // Secure token for authenticated card-saving
});
```
Where:
* **`checkoutData.customer`**: Contains customer information.
* **`secureToken`**: The token generated by the backend.
After completing these steps, your SDK implementation should look like the following example: